Workspaces
A workspace is the top-level container in Brisal. Everything you work with — your projects, the providers and models behind your agents, the agents and skills themselves, your sessions, even the theme — lives inside a workspace.
Its job is to compartmentalize. A freelancer juggling several clients, or one machine shared between work and private life, can keep each world’s code and its LLM providers, licenses, and agents behind a wall, with no bleed between them. Most people create a single workspace and never think about it again. The feature exists for the people who need that wall.
What’s inside the wall
A workspace is a self-contained world. Everything below is scoped to the selected workspace — nothing is shared with another workspace:
| Walled per workspace | |
|---|---|
| Projects | The repositories and folders you work in |
| Providers | The LLM services you’ve configured, including their keys |
| Models | The models you’ve set up against those providers |
| Agents | The agents available to run sessions |
| Skills & Tools | What those agents can reach for |
| Sessions | The chats themselves |
| Theme | The workspace’s own palette and appearance |
The rule is simple: if something isn’t isolated between workspaces, that’s a bug. Two workspaces never see each other’s projects or provider keys.
Alongside your workspaces, Brisal ships a System layer of built-in, non-configurable providers, models, agents, and skills — think of them as templates. Every workspace can draw on those built-ins; how each concept builds on the System layer is covered on its own page (Providers, Agents, Skills).
The single-workspace user
If you only ever need one workspace, it stays out of your way. There’s no concept of a “current profile” to manage — you make a workspace once, and it’s simply the container everything lives in.
Brisal doesn’t seed a workspace for you, so the very first thing you’ll do is create one. After that, the workspace selector always sits in the header, even with a single entry, so switching is always one click away if you ever add a second.
The Workspaces index
You manage your workspaces from the Workspaces index — the page listing every workspace as a card, each with its own Select, Edit, Archive, and Delete actions. Reach it from anywhere in the app by clicking the Brisal logo at the start of the breadcrumb, at the top of the pane. Its + New Workspace button (top-right) opens the new-workspace form.
Creating a workspace
On a fresh install the pane shows a No Workspaces card with a Create Your First Workspace button. You can also reach the new-workspace form any time from:
- the + New Workspace button on the Workspaces index, or
- the + Add workspace entry in the header’s workspace selector.
The form asks for three things:
| Field | Notes |
|---|---|
| Name (required) | 3–50 characters; letters, numbers, spaces, hyphens, and underscores |
| Description | Optional free text |
| Tags | Optional comma-separated labels for organizing workspaces |
Creating a workspace automatically selects it, so you land ready to add your first project.
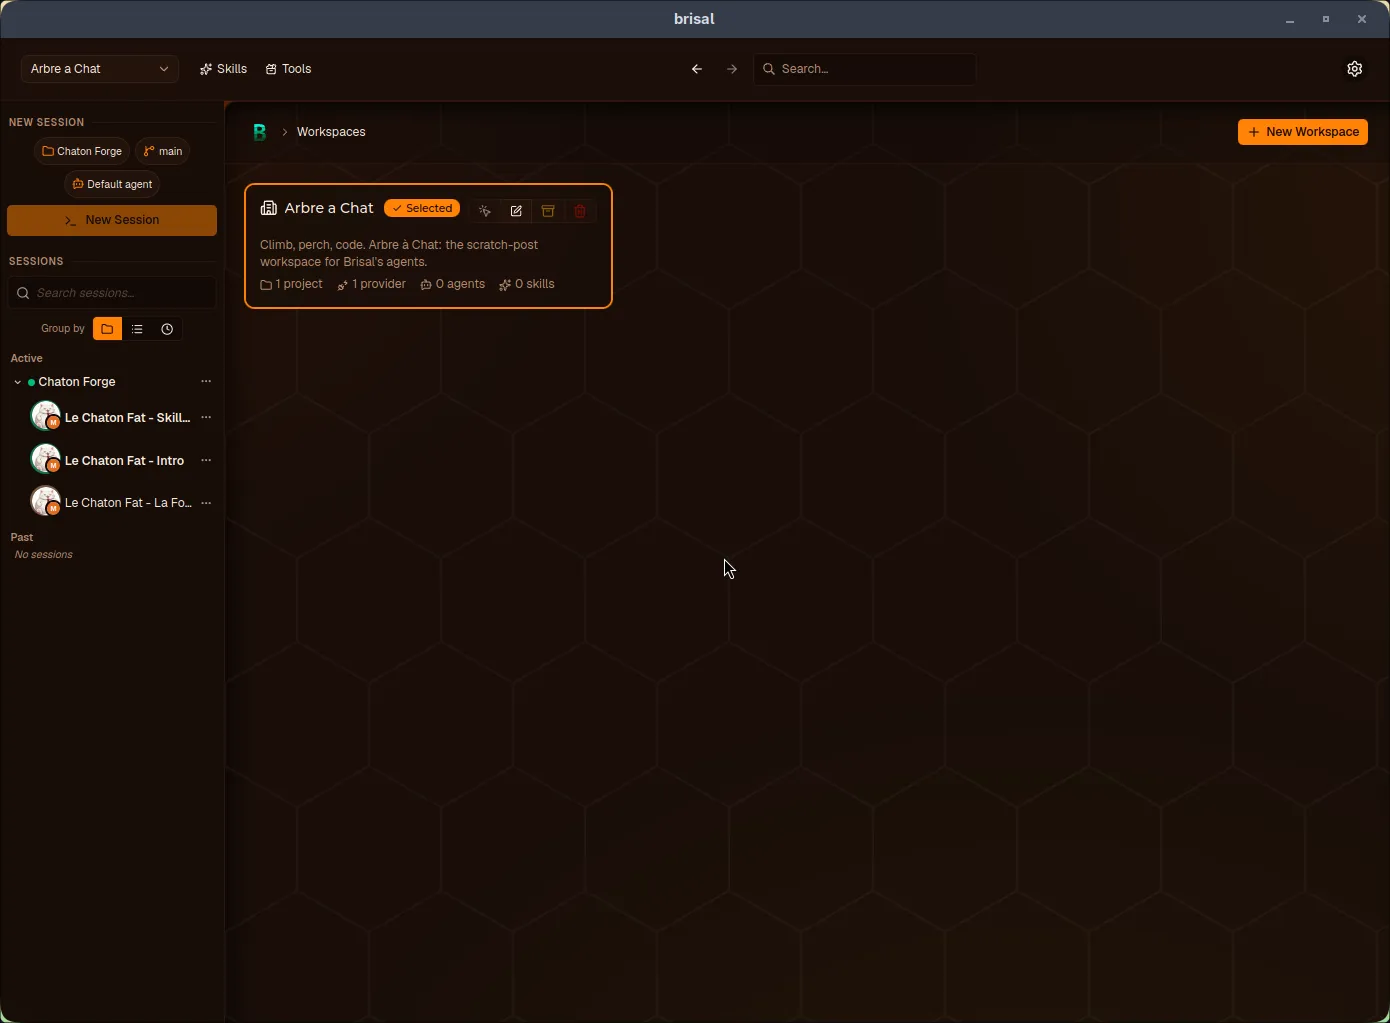
A workspace card on the index: the Selected badge, its action buttons, and a count of what it contains.
Selecting and switching
The selected workspace is the one you’re working in — the workspace whose projects and sessions you create and see. Exactly one workspace is selected at a time, and everything below the header is scoped to it.
You can tell which one is selected in two places: the header selector names it, and its card on the Workspaces index carries a green Selected badge. When a workspace is selected, the header also grows Skills and Tools shortcuts that jump into that workspace’s tabs.
To switch, pick another workspace from the header selector, or press Select on its card in the index. Selecting a different workspace swaps your entire context — the sidebar’s sessions, the available agents, the theme.
Renaming a workspace
Open the Workspaces index, press Edit on the workspace’s card, and change its name, description, or tags. Renaming only changes what you see; it doesn’t move or affect the projects inside.
Archiving a workspace
Each card has an Archive action for setting a workspace aside. Today archiving is a lightweight marker with no further effect — the workspace stays in place. It’s intended to grow into a way to declutter the selector and skip loading workspaces you’re not using.
Deleting a workspace
Delete a workspace from the Delete action on its card in the index. You cannot delete the selected workspace — select a different one first. (This means your only workspace can’t be deleted until you’ve made a second one to select.)
Git & commit authoring
Commits Brisal makes on your behalf — whether you commit from the UI or your agent does it through its Git tool — are authored by the workspace’s git identity. You edit it on the workspace’s Git tab. Because it’s per-workspace, the same editor is also reachable from Settings (the header cog) → Git, scoped to the currently selected workspace:
| Setting | What it controls |
|---|---|
| Workspace git identity (Name + Email) | The author of commits Brisal makes in this workspace’s projects |
| Attribution trailers | Which Brisal-* trailer lines get appended to attributed commits |
The identity resolves with a clear precedence, and Brisal never touches your
global ~/.gitconfig:
- A project’s repo-local git config wins if it sets its own
user.name/user.email. - Otherwise the workspace identity is used.
- If you leave both fields blank, commits fall back to a default
Brisal <brisal@local>.
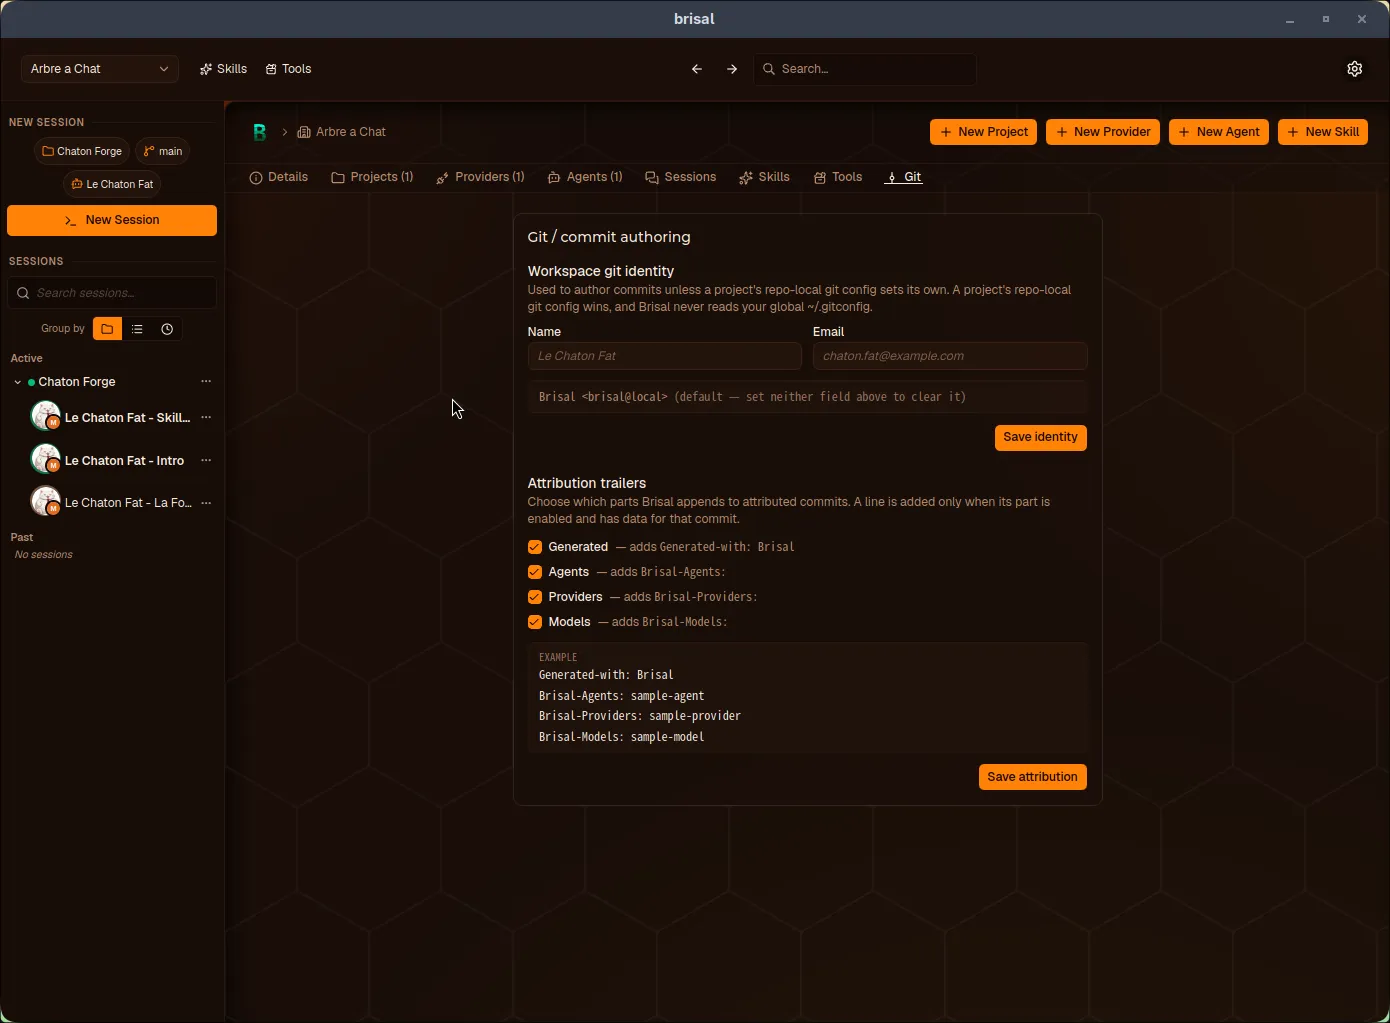
The Git / commit authoring screen: the workspace git identity above, the attribution-trailer toggles and their live example below. Each half saves independently.
Attribution trailers are opt-out toggles — each adds one line to attributed commits only when it’s enabled and has data for that commit:
| Toggle | Trailer line |
|---|---|
| Generated | Generated-with: Brisal |
| Agents | Brisal-Agents: … |
| Providers | Brisal-Providers: … |
| Models | Brisal-Models: … |
Identity and attribution are saved independently — each has its own Save button.
What to read next
A workspace is just the container; the work happens through what it holds. The path to a running session runs through several concepts in order — a workspace holds a provider, which offers models, which back an agent, which runs a session:
- Projects — the repositories you actually work in, inside a workspace.
- Providers → Models → Agents — the building blocks, all workspace-scoped.
- Worktrees — the branches a project’s work lives on, and where the git identity and attribution above get applied.
- Settings — the global-vs-workspace scope model in depth.
- Appearance & theming — how each workspace carries its own palette.