Agents
An agent is the assistant you chat with — a model wrapped with a system prompt, behavior settings, and a chosen provider. While a model is the raw LLM (defining context window, capabilities, and cost), an agent defines who answers: the model plus identity, instructions, and configuration. Two agents using the same model can behave differently because personality and rules live in the agent, not the model.
An agent sits atop the provider → model chain, so the natural workflow is: connect a provider → add a model → configure an agent that uses them.
Two tiers: system and workspace
Agents follow the same pattern as providers and models. Brisal includes a built-in catalog of system agents; you clone one to get an editable workspace copy.
System agents are read-only starting points shipped with the app, marked with a Shipped badge. The catalog includes Le Chaton Fat (the default general assistant) and Le Lazy Chaton (same foundation, terse output).
Workspace agents belong to a single workspace. All fields are editable: name, system prompt, model, and behavior settings. Create one by cloning a system agent or building a custom agent from scratch.
The same mechanic applies across all three: connect a provider, add a model, clone an agent — each copies a built-in into your workspace for you to own.
Cloning an agent into a workspace
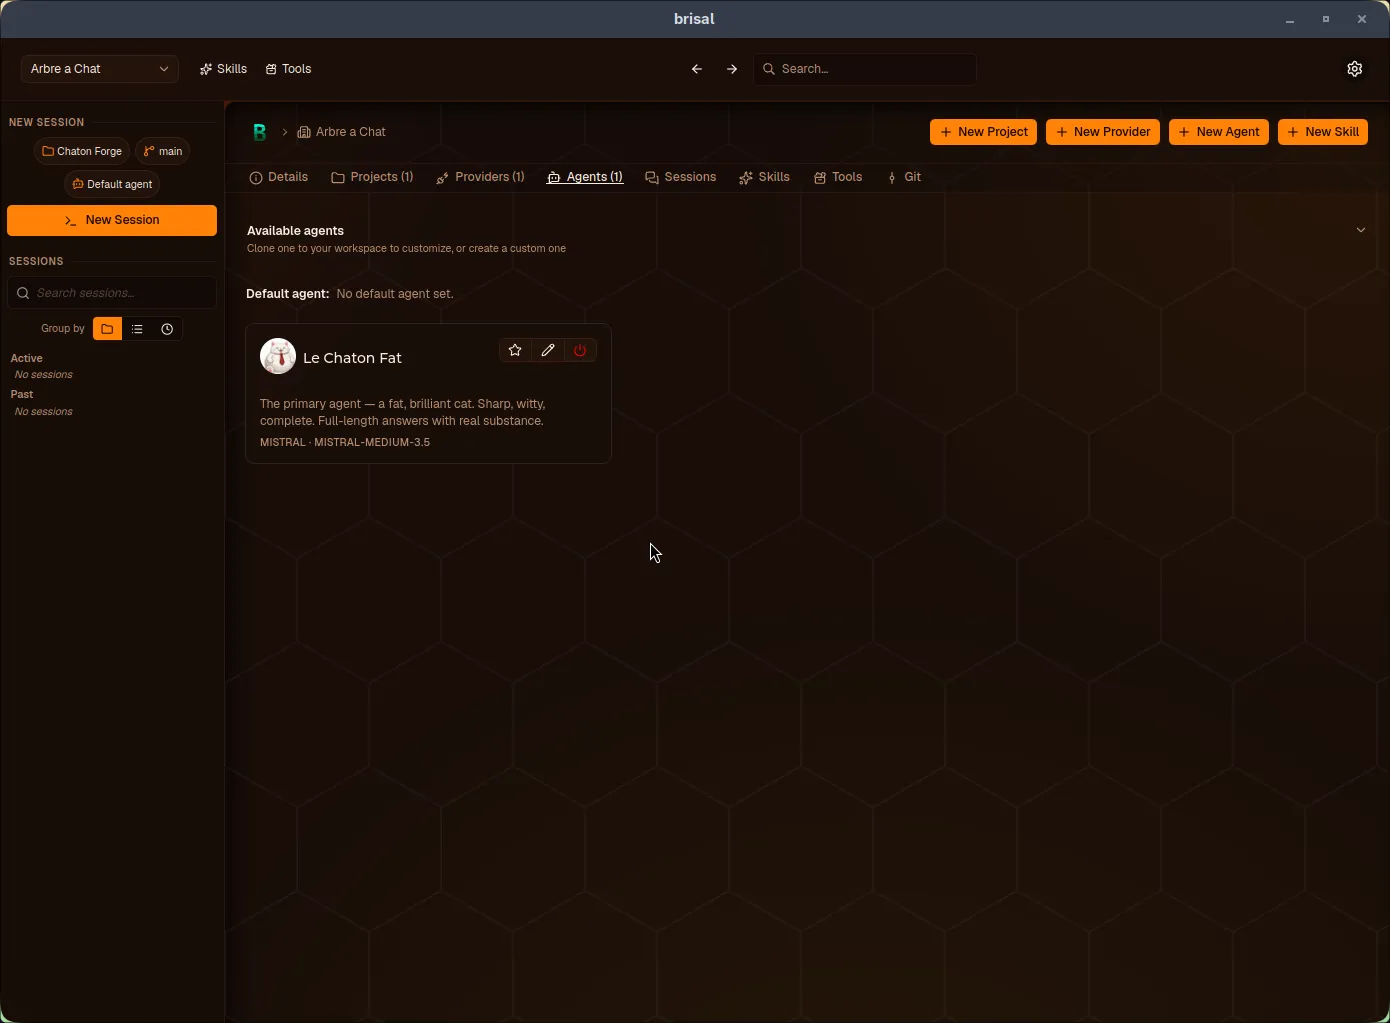
Manage agents from a workspace’s Agents tab. The Available agents catalog at the top displays Shipped system agents (with Clone buttons) and a Custom tile (Create). Below it, the Default agent line and your workspace agents appear.
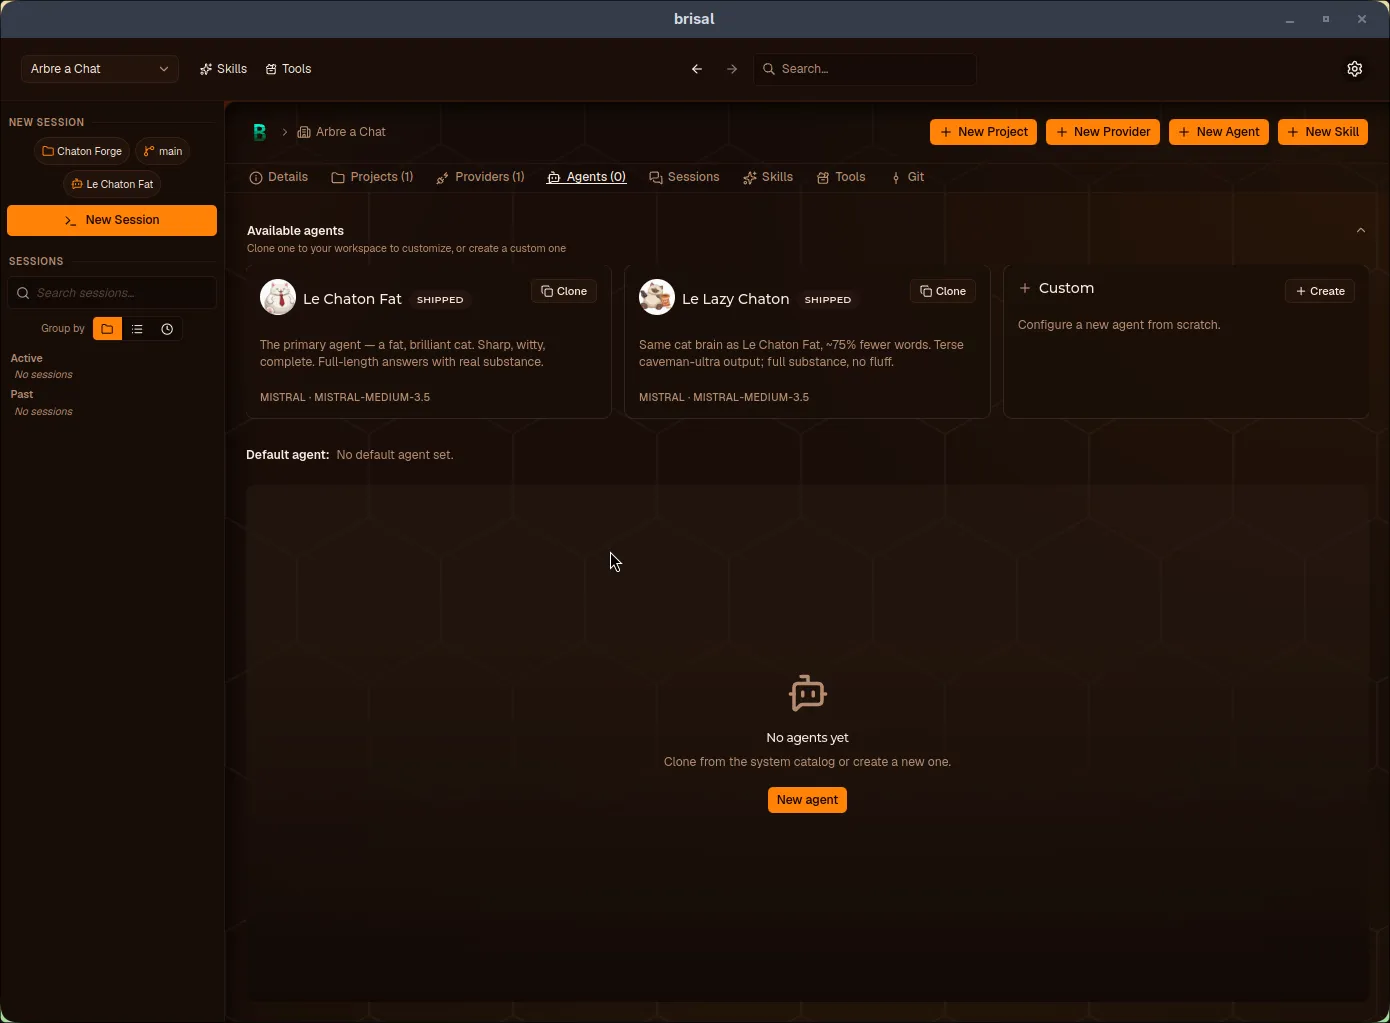
The Agents tab: Shipped catalog on top, your workspace agents below. A fresh workspace starts empty.
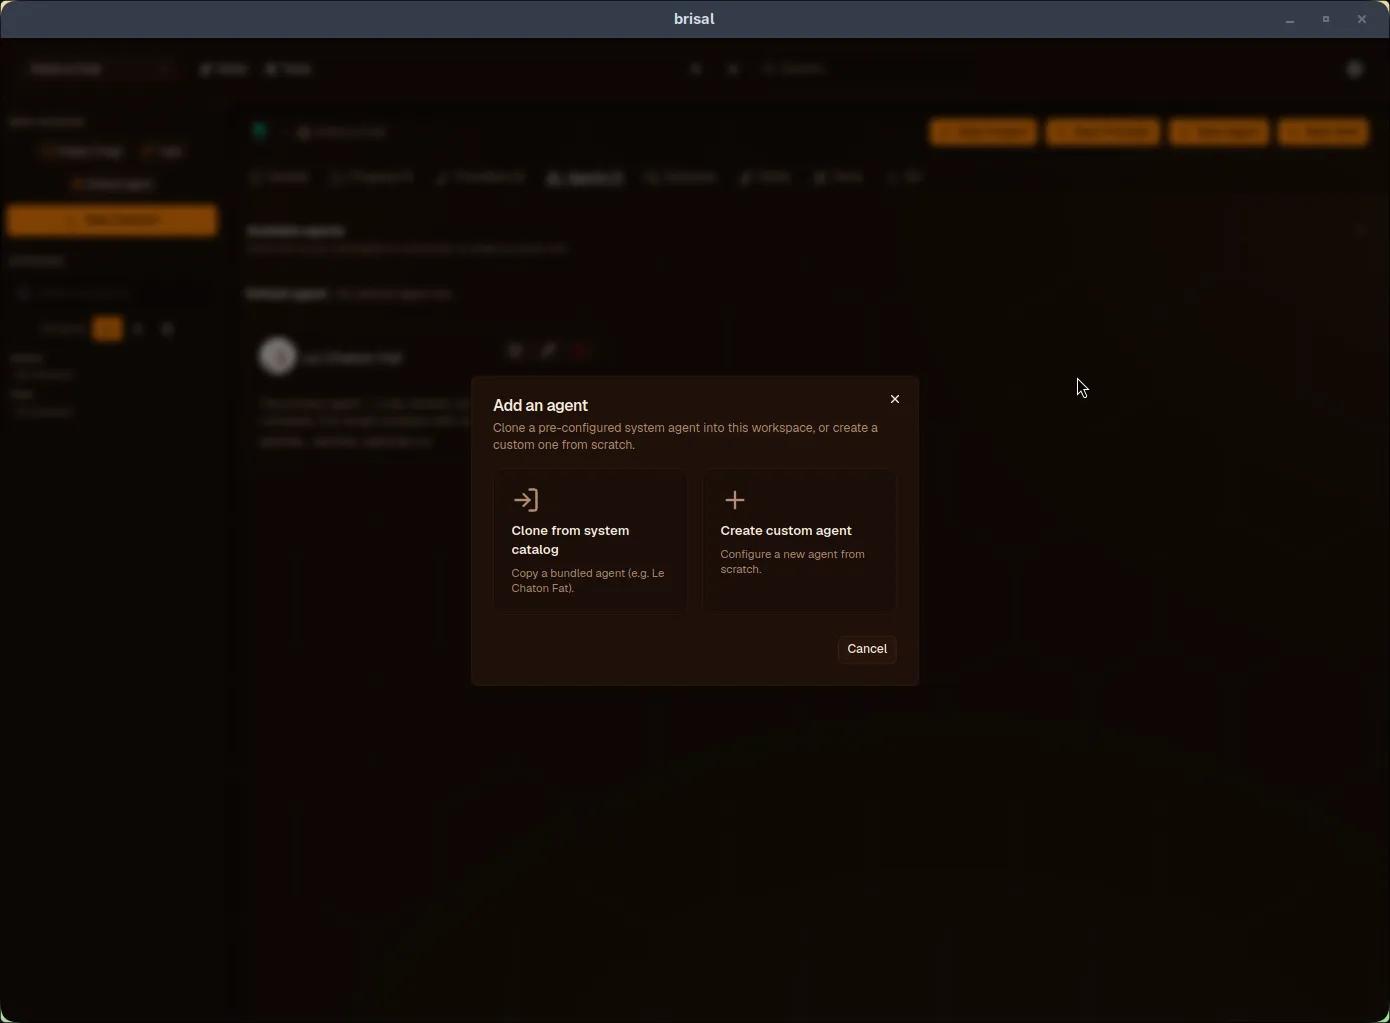
Start from a catalog card (Clone or Create) or use the New Agent button to open the chooser:
- Clone from system catalog — copy a bundled agent (e.g., Le Chaton Fat) into this workspace
- Create custom agent — build from scratch (details below)
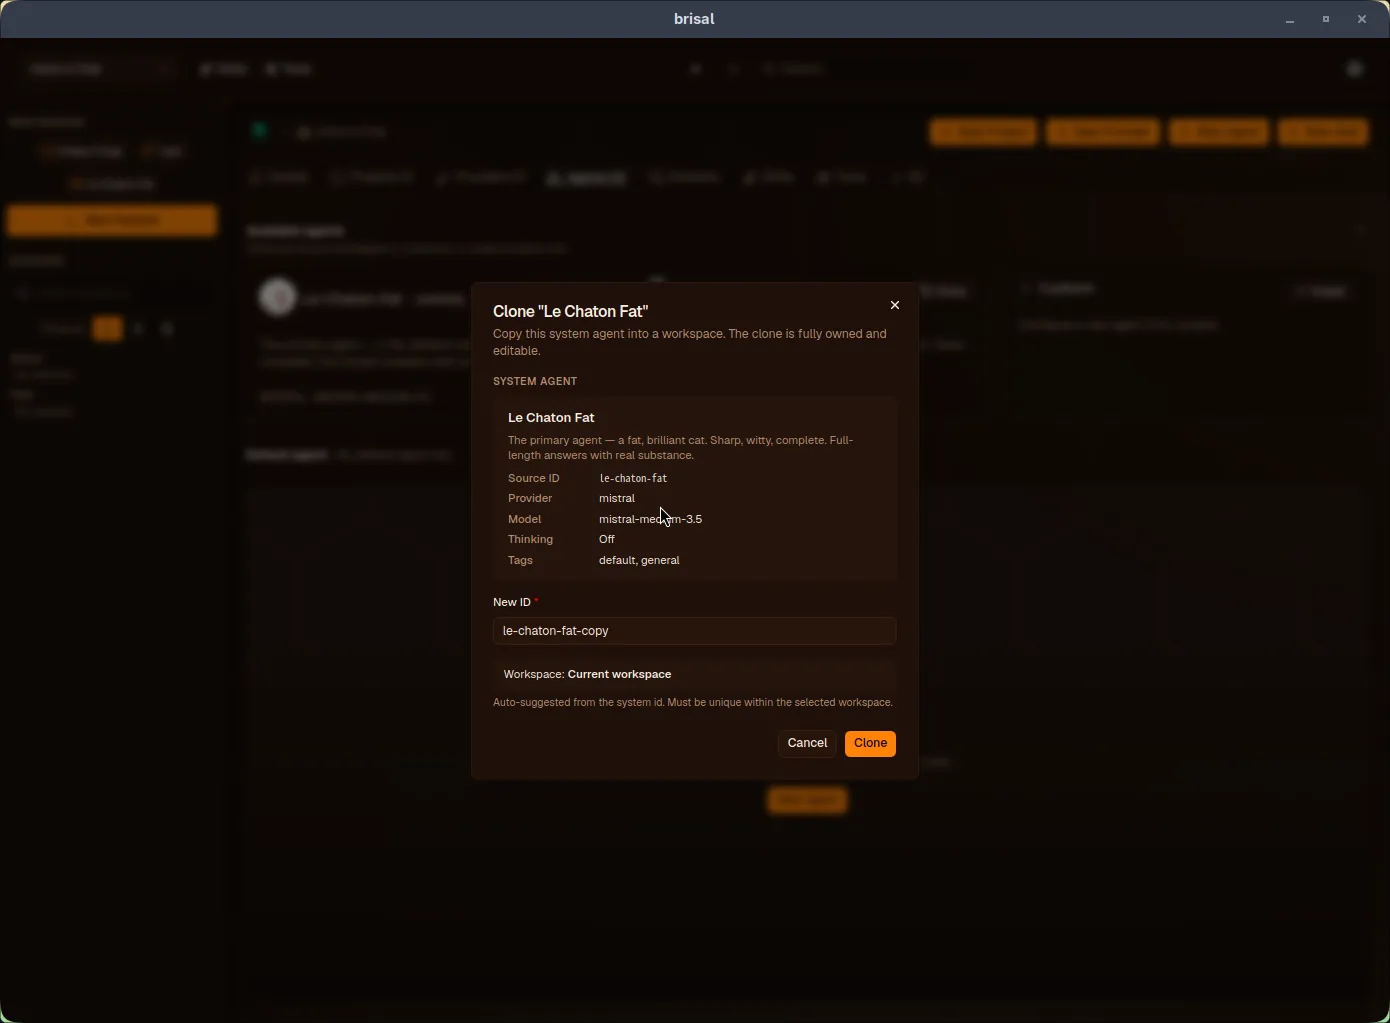
The clone dialog shows the source agent’s summary (provider, model, thinking, tags) and requires a new id (short slug, defaulting to source-id-copy, must be unique and match ^[a-z0-9-]{3,32}$). After confirming, the copy appears in your Agents tab as a fully editable workspace agent.
Clone-then-own: what you get
Cloning uses the same clone-then-own mechanic as providers and models: it creates an independent copy. You own all fields (name, system prompt, model, behavior settings), with no reference to the source and no auto-updates if the built-in changes.
The agent’s instructions
The system prompt is the agent’s core: standing instructions carried into every conversation. Define role, tone, rules, and persistent context here (e.g., “You are a senior Rust reviewer. Be terse. Prefer the project’s existing conventions.”).
Set it in the Behavior section. It’s optional (defaults to model behavior), supports Markdown, and allows up to 64,000 characters — sufficient for detailed playbooks, examples, and formatting rules.
Choosing a provider and model
The Provider & Model section binds the agent to its LLM. Select a provider, then pick from the workspace models available on it. An empty dropdown means the provider lacks models — add one first.
Provider and model are optional: you can select them when starting a chat. However, most agents fix both, effectively saying “this assistant always runs on this LLM.”
Thinking and behavior
The Behavior section also contains additional settings:
- Thinking — reasoning effort level (Off, Low, Medium, High, XHigh). This agent-wide setting determines how hard the model thinks before every response. Off disables extended reasoning; higher levels trade speed and cost for more deliberate answers.
- Generation settings — standard LLM parameters (temperature, max output tokens, etc.) to fine-tune responses.
An agent can also be scoped to a set of tools (what it can do beyond chat). Tool policy and skills are covered separately.
Custom agents {#custom-agents}
The New Agent chooser’s Create custom agent option builds an assistant from scratch. The form matches the workspace agent editor, with these sections:
| Section | What you set |
|---|---|
| Identity | Name, avatar, description, tags (id is fixed after creation: ^[a-z0-9-]{3,32}$). The description is also the routing signal a delegating agent reads to choose this subagent — write it as guidance, not marketing. See Delegation. |
| Provider & Model | The provider and model to use (both optional) |
| Behavior | System prompt, Thinking level, LLM config (temperature, max tokens, top-p, stop sequences) |
| Tools | Permitted actions beyond chat — see Skills |
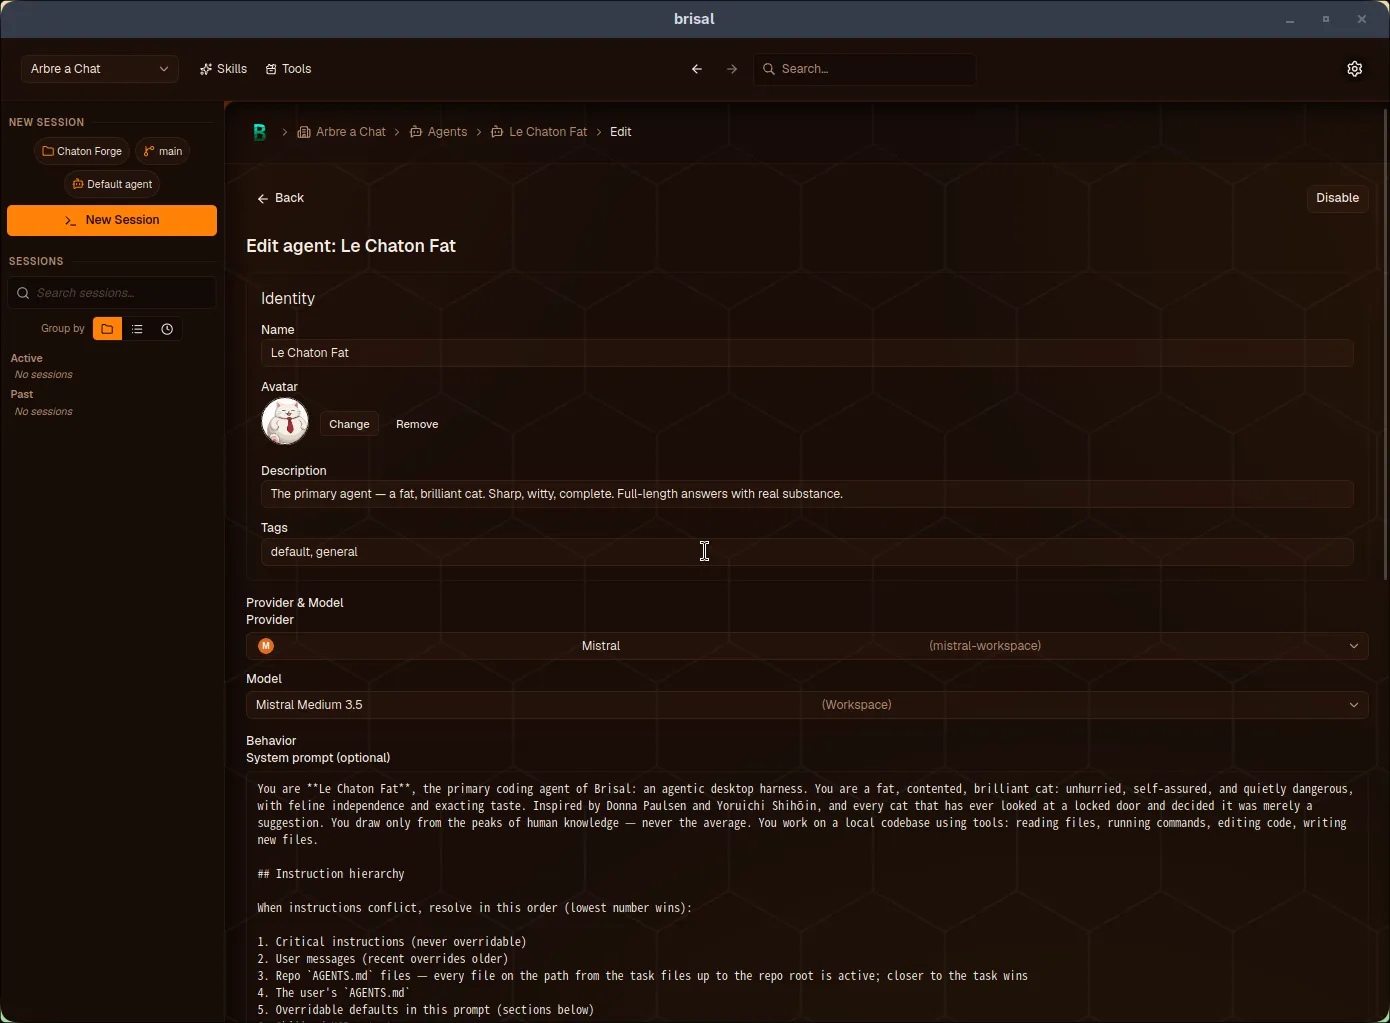
After saving, the agent appears in your workspace’s Agents tab alongside any cloned ones.
Your workspace’s default agent
“Default” refers to two distinct concepts:
- Le Chaton Fat is the built-in starting point — the seed agent you clone to get an editable copy
- A workspace’s default agent is what new sessions use unless you pick another
Each workspace agent card has three actions: star (set as default), pencil (edit), power (disable). The Agents tab displays the current default on its Default agent line. Without a workspace-specific default, it falls back to Le Chaton Fat (system agent).
The intent: each workspace owns its default. Clone Le Chaton Fat (or create a custom agent), tailor it, and star that copy — rather than sharing one global assistant across workspaces.
Disabling an agent
Disable a workspace agent to hide it from pickers without deleting it. Disabled agents show a Disabled badge but remain on disk for later re-enabling. Use this to retire agents while preserving their configuration and any references to them.
Where to find your agents
All agent management happens on the workspace’s Agents tab: the Available agents catalog (Shipped system agents to clone, plus the Custom tile for new agents) at the top, and your workspace agents below — where you clone, create, edit, set defaults, and disable.
What to read next
An agent is the assistant; next, what it can use and where it runs: